First, you will need to have downloaded OpenCart Platform to your server if you have not already done so. Refer to OpenCart for
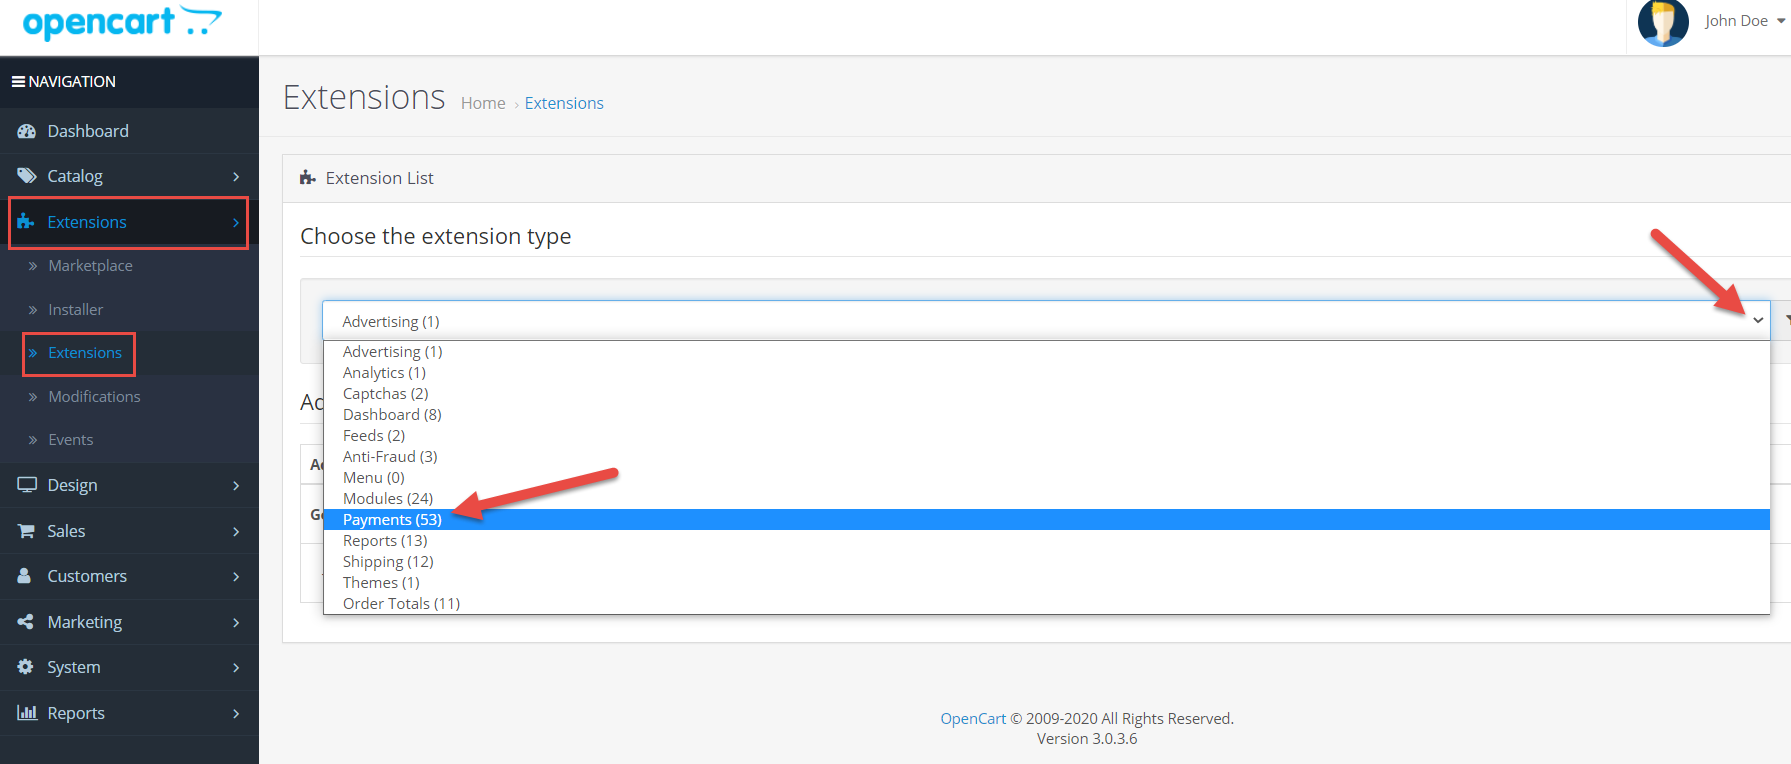
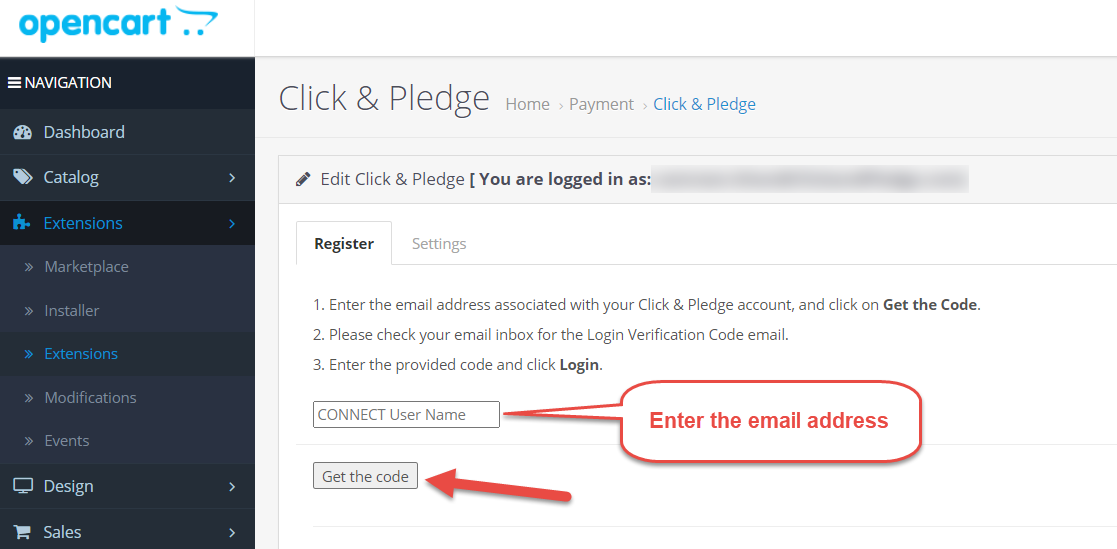
. Once Open Cart has been installed with your host, the Click & Pledge integration module needs to be installed. The following provides a step-by-step procedure for installing the Click & Pledge module:
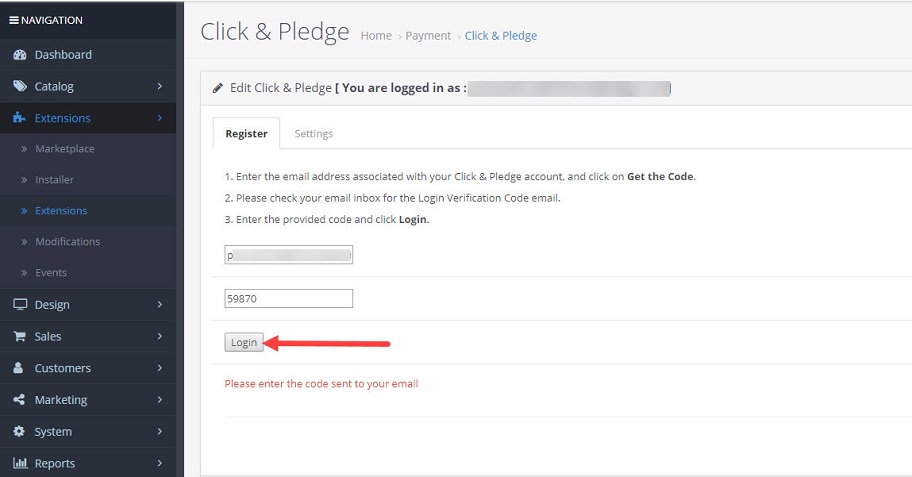
Paste the copied code and click Login. Go to Settings Tab to edit/view the settings.
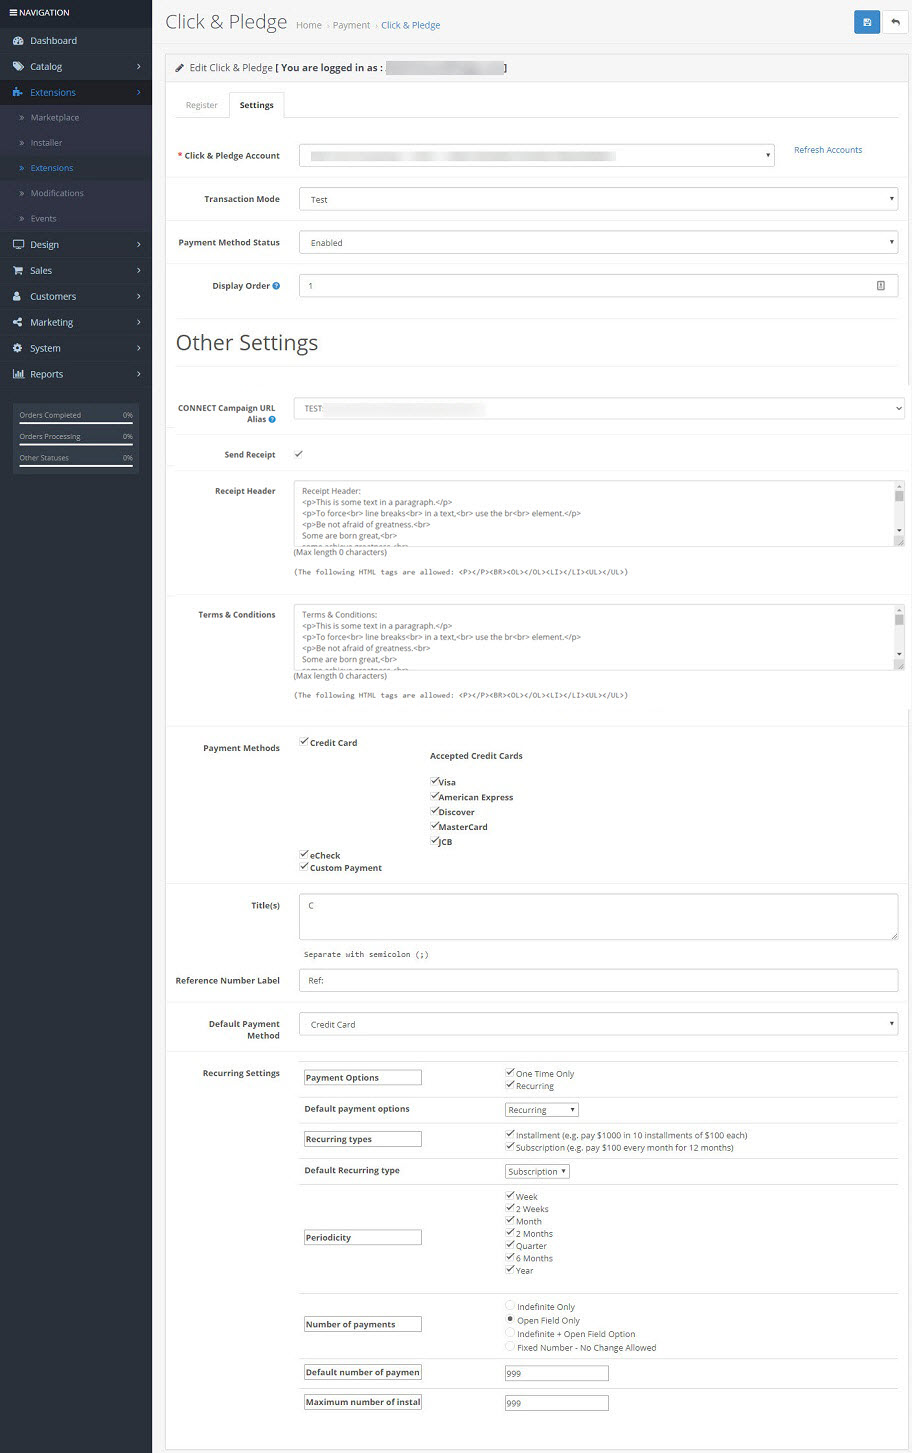
*Click & Pledge Account: The account which is associated with the logged-in email address will be displayed. Users who have multiple accounts can select the desired account from the drop-down menu. Click Refresh Accounts if any changes made in the CONNECT so that those changes will reflect here.
Transaction Mode: It may be set either to Test or Production. Test mode is used to test the transactions. No amount will be deducted from the payment. Production mode is nothing but live payment where the given amount will be deducted from the selected payment type.
Payment Method Status: It may be set either to Enabled or Disabled. By enabling, Click & Pledge payment gateway will be available in the External Site and vice versa.
Display Order: Enter the numeric so that the display order in the External Site will be re-ordered. For example, if it set to 1, then Click & Pledge will be the first in the display order.
CONNECT Campaign URL Alias: Transactions will post to this selected Campaign. The receipt which is assigned to this campaign will be sent to the recipient. The donated amount will be added to this campaign.
Send Receipt: Enable the checkbox so that the receipt will be sent to the recipient.
Receipt Header: Enter the receipt header. 1500 characters is the maximum length and HTML tags like <P></P><BR/><OL></OL><LI></LI><UL></UL> may be used.
Terms & Conditions: Enter the terms and conditions. 1500 characters is the maximum length and HTML tags like <P></P><BR/><OL></OL><LI></LI><UL></UL> may be used.
Payment Methods: The payment methods which are enabled in CONNECT will be displayed here. Except Custom Payment, all the remaining payment methods are disabled.
Title(s): Enter the custom payment names which you want to show in the External Site. Separate them with semicolons (;).
Reference Number Label: Enter the reference number label of the custom payment.
Default Payment Method: Select the default payment method. The titles given to the custom payments will also be available to select as the default payment.
Recurring Settings: The settings made here will reflect in the External Site.
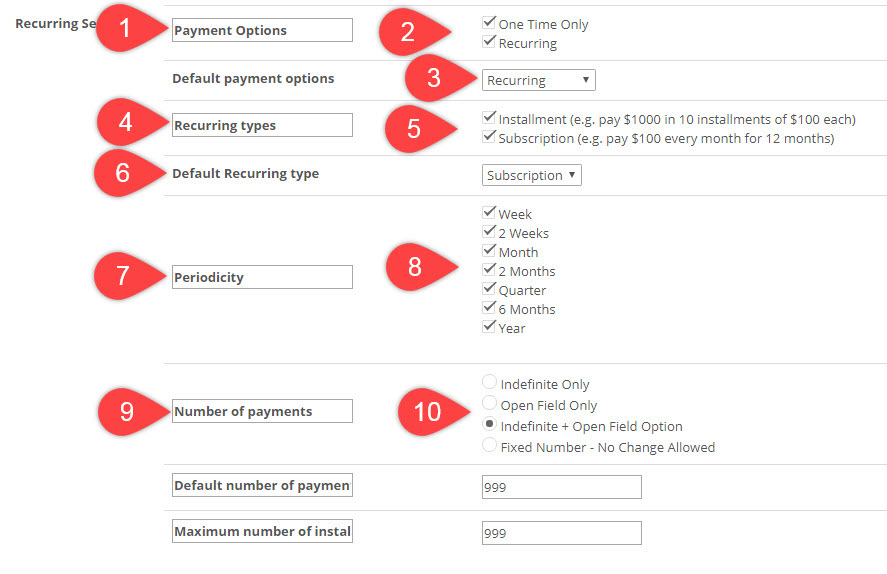
- The name mentioned here for the payment methods will be displayed in the External Site.
- Enable or disable the one-time only & recurring options as per the need.
- If both one-time only & recurring options are active, then this option will be available. Select one as the default payment options.
- The name entered here will be displayed in the External Site. This field is related to recurring, so it will appear when the Recurring is selected under Payment Options (Step:1).
- Installment: Click Installment checkbox to offer installment method. This will allow a patron to break a payment into smaller installments. Range is from 2 to 998.
Subscription: Click Subscription checkbox to offer subscription method. This allows a patron to opt into making a repeat payment at the time interval they choose. Range is from 2 to 999.
- The selected option will be displayed as the default recurring type in the External Site.
- The name mentioned here for the periodicity will be displayed in the External Site.
- Select the desired periodicities so that they will appear in the External Site.
- The name mentioned here for the number of payments will be displayed in the External Site.
- Indefinite Only: If this option is selected then 998 times for installments and 999 times for subscription, the recurring option will be continued.
Open Field Only: If this option is selected, “Default number of payments” and “Maximum number of installments” can be given. The entries given here can be changed in the External Site.
Indefinite + Open Field Only: If this option is selected, the default value will be 999 which can be changed accordingly in the External SIte.
Fixed Number: If this option is selected, the number entered in this field remains constant.
Note: Gift Voucher option is currently not supported.
External Page
After making all the necessary changes in the Settings page, let’s see how to buy a product with Click & Pledge payment gateway.
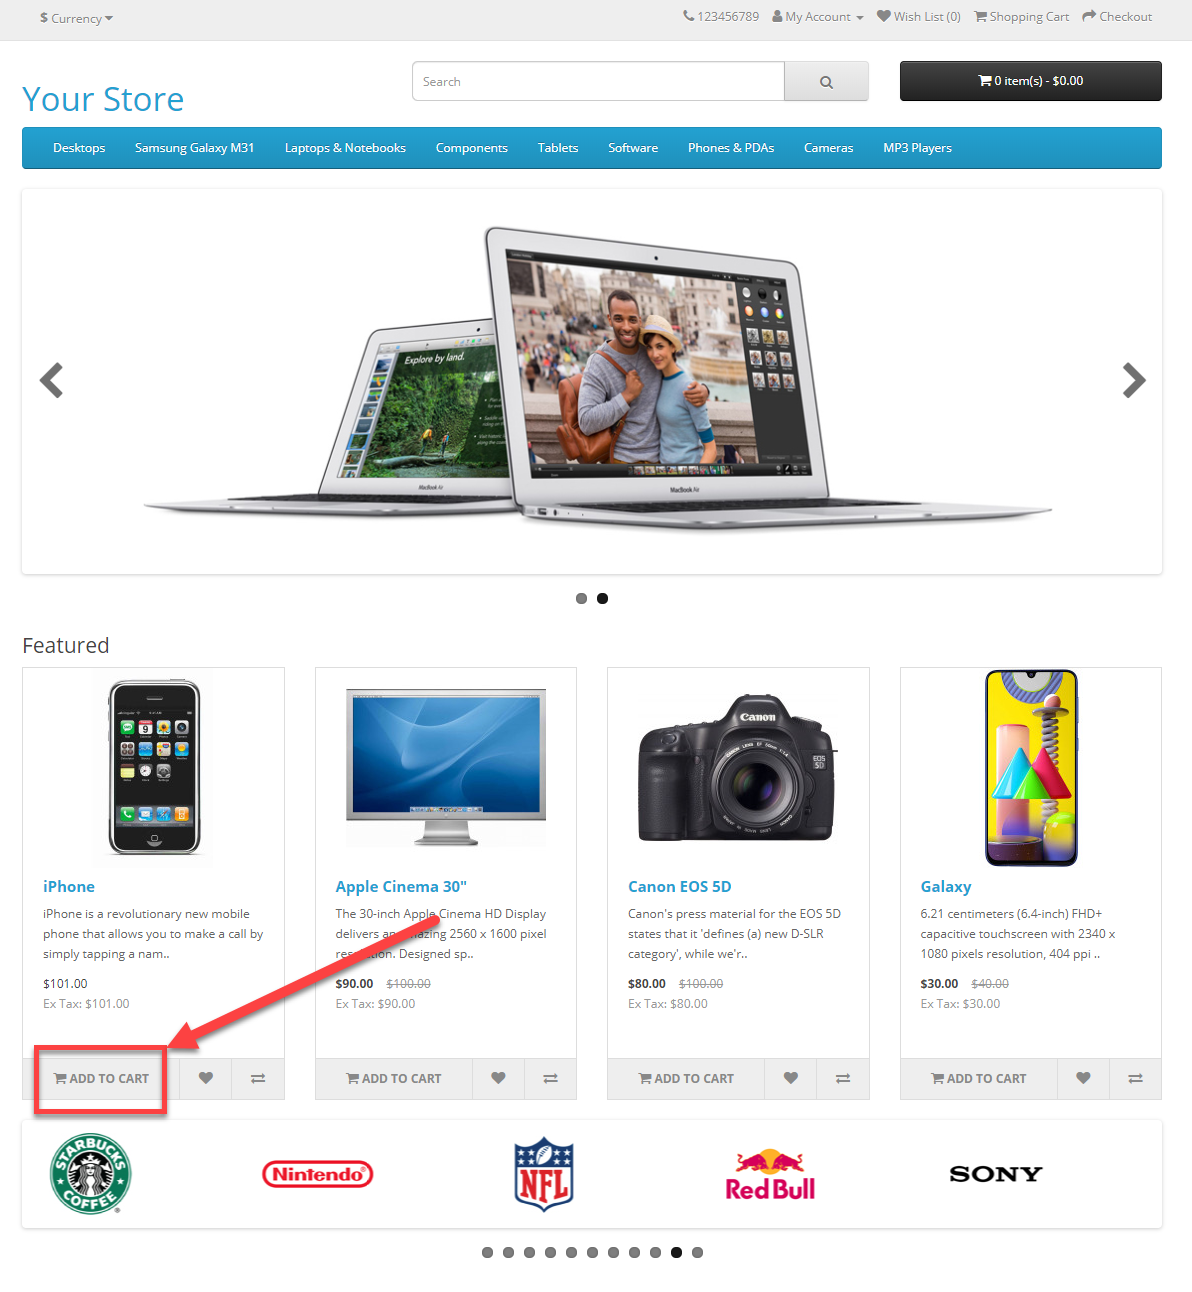
Step 1: Go to the Shop page, click on the Add to Cart button of the desired product(s)
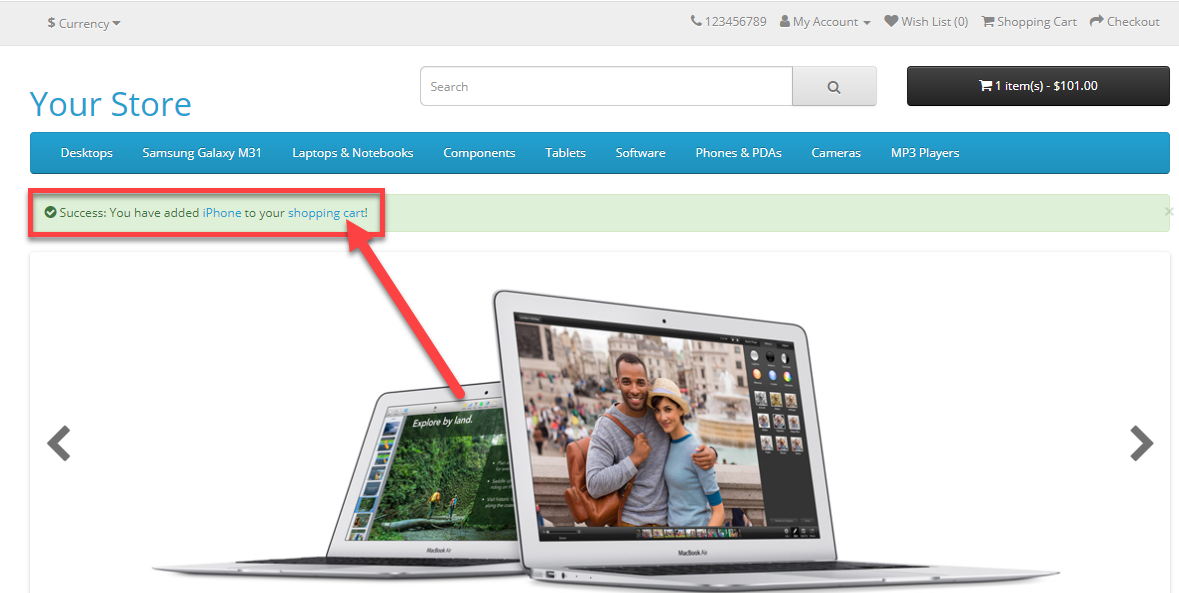
Step 2: You see the alert on the top of the page. Click on the Shopping Cart.
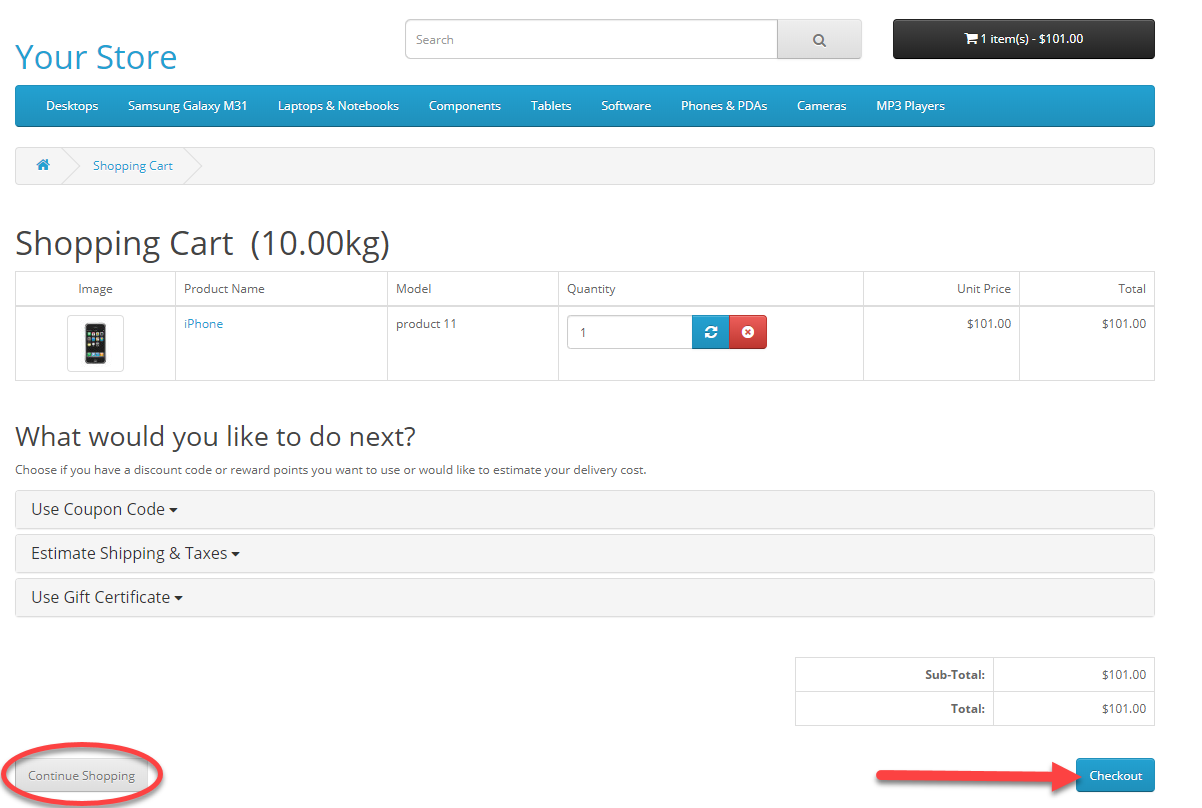
Step 3: Check the product(s) in the cart and click Checkout.
NOTE: If you want to add few more products to the cart, click Continue Shopping.
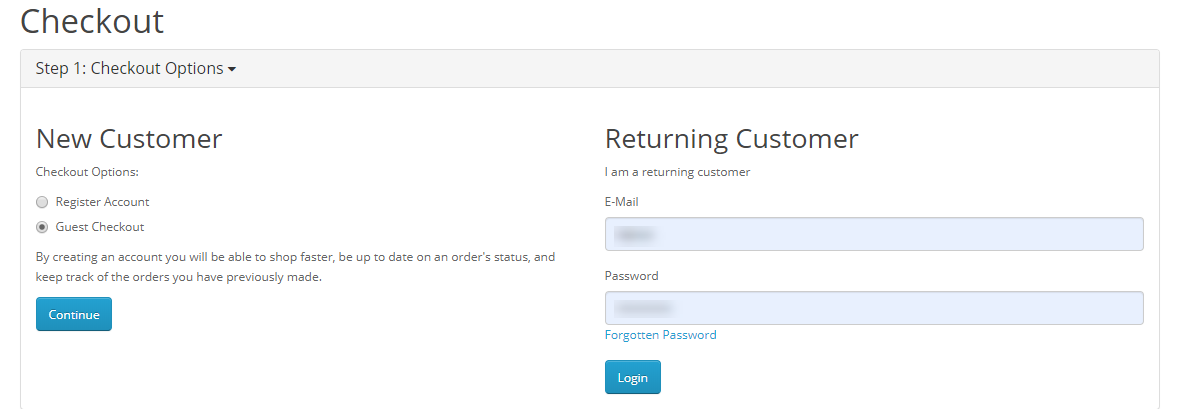
Step 4: Enter the Email address and password and click Login, if you are a returning customer. Or select Guest Checkout and click Continue if you are a new customer.
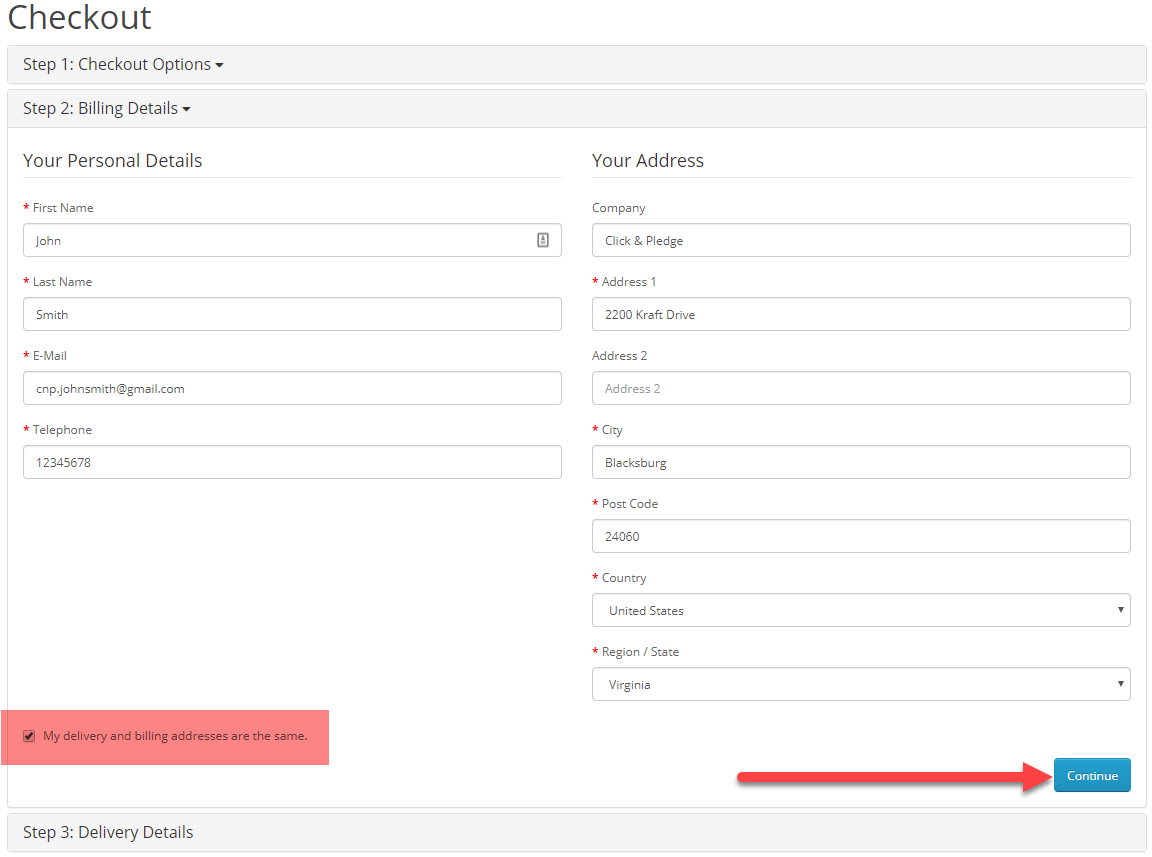
Step 5: Enter the Billing details and click Continue. If the both Billing and Shipping addresses are same, enable the checkbox for My delivery and billing addresses are the same. If not, disable it.
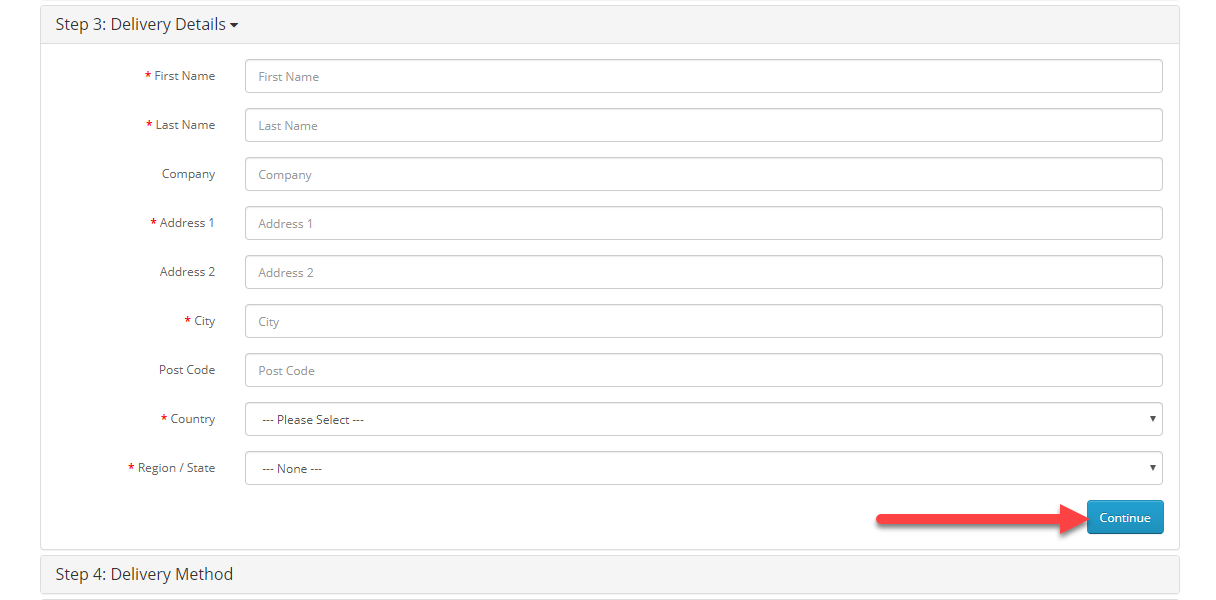
Step 6: If both the billing and delivery addresses are not same, then you will be asked to enter the details for Delivery Details.
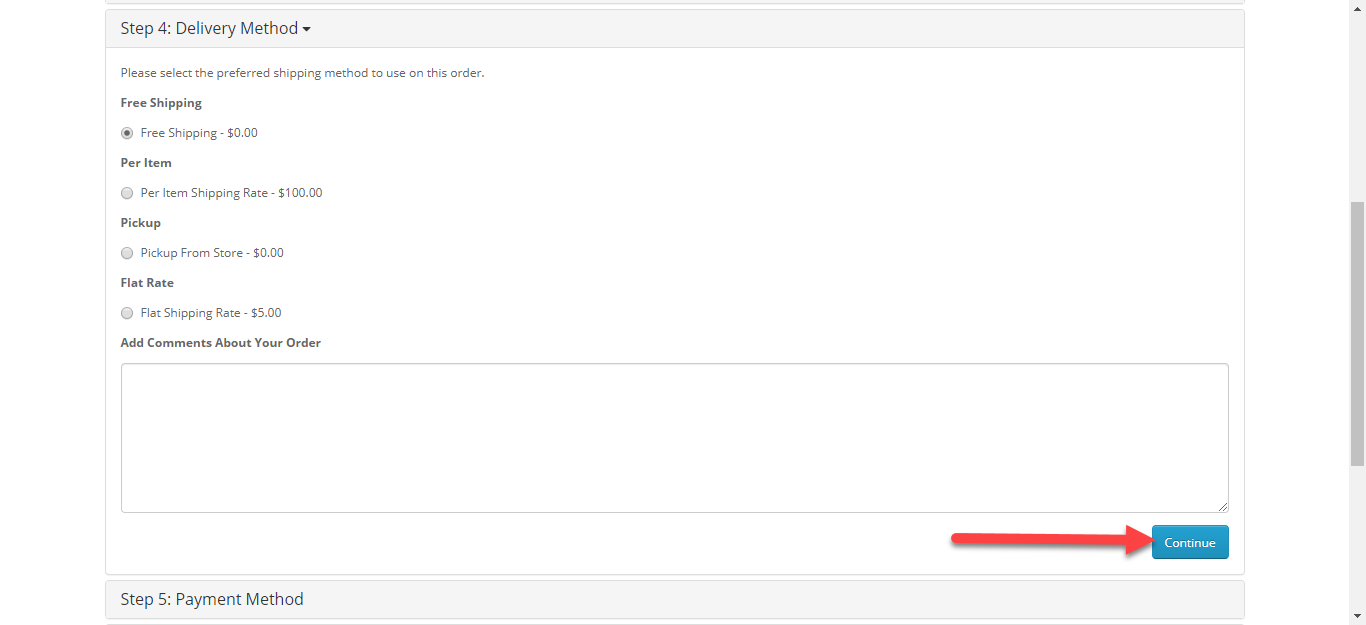
Step 7: Please select the preferred shipping method to use on this order and click Continue.
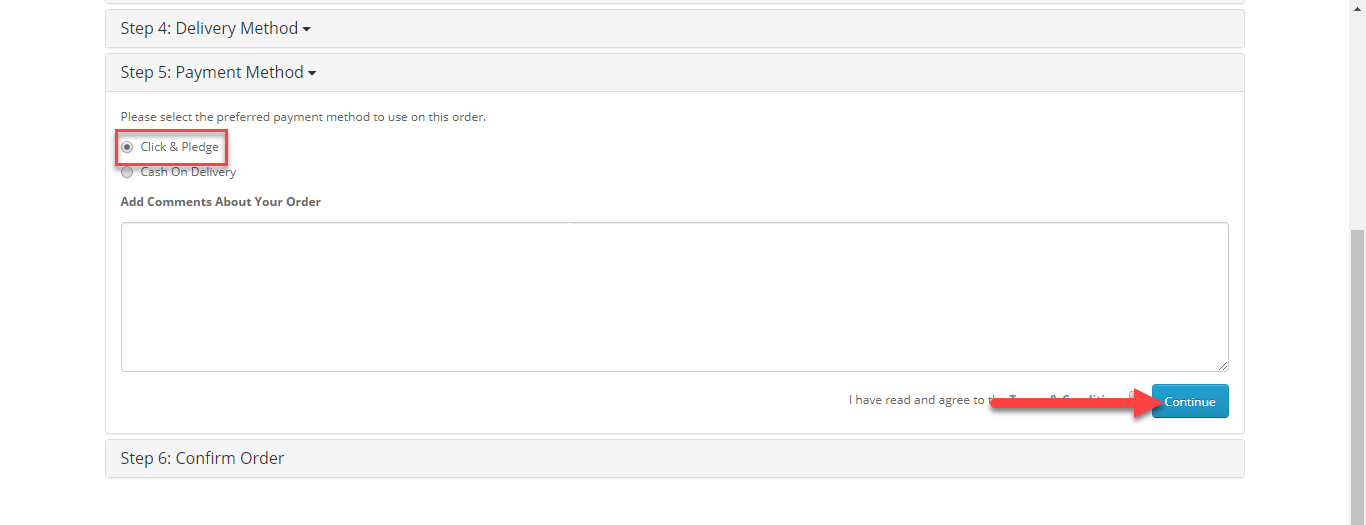
Step 8: Please select Click & Pledge as the preferred payment method and click Continue.
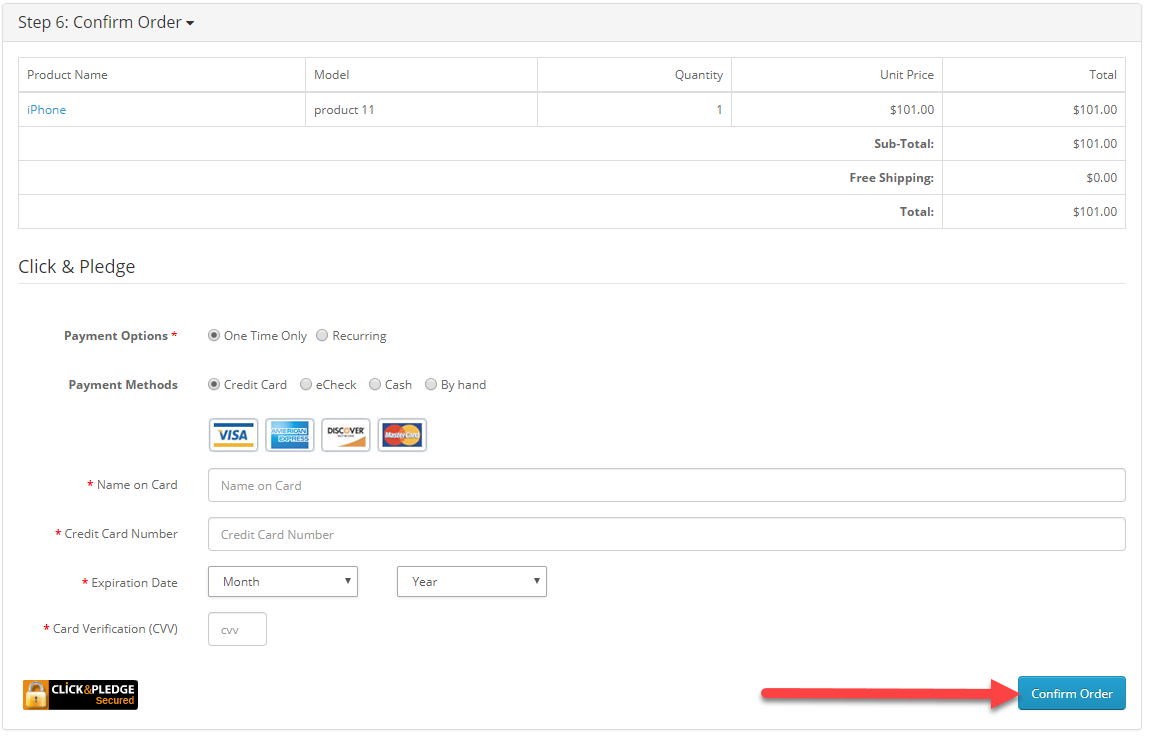
Step 9: Enter the card details and confirm the order.
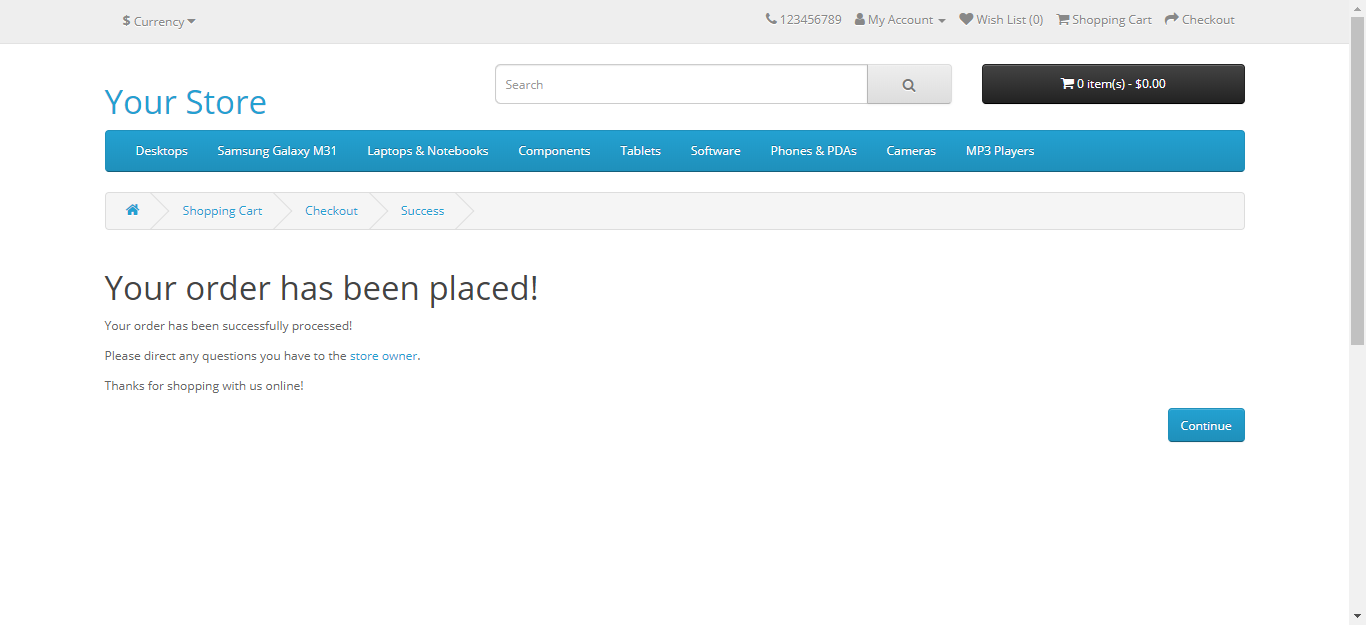
You will see the confirmation message that your order has been placed.
 Uploading ....